Spotlight: SentinelOne - True Context
Discover how SentinelOne's True Context can be a powerful tool in the investigation and response of a Cyber Security incident.
True Context is heralded as a gem in SentinelOne’s crown. It minimises the dwell time by neatly linking the attack chain together, allowing your security team to rapidly trace the actions of a breach.
In 2019 the average time-to-containment of a breach was 314 days with 108 days to contain a breach once found. With the average incident responder salary at £62,500, responding to incidents can quickly become an expensive process. Most of the time spent responding to an incident is spent scoping out the extent of the breach and finding the entry point. If we can take this response time down to minutes or, in this case, perhaps even seconds, the savings in both time and money are manifest.
True Context is a feature of SentinelOne’s Complete licence (more on SentinelOne’s licensing options) and is used to contextualise events within their Deep Visibility platform. A True Context ID is provided to every action that happens on the endpoint. True Context gives the same ID to all events and processes that have been spawned from the same action or event, allowing you to see what is directly related to that event. It then ties this to the True Context IDs of the events leading up to it (this could be opening a browser or logging on).
In this article, I cover what True Context tracks, how it can be used, and the solution it provides.
Aims of this article
- Show two different entry points for a breach and how True Context tags them.
- See lateral movement within SentinelOne’s management console.
- How Deep visibility displays this information and is used in investigating incidents.
My Lab
In this article, I show how SentinelOne displays lateral movement, how True Context is able to link the events together to trace back to the entry point of a breach, and how we can see this within Deep Visibility.
The Malware
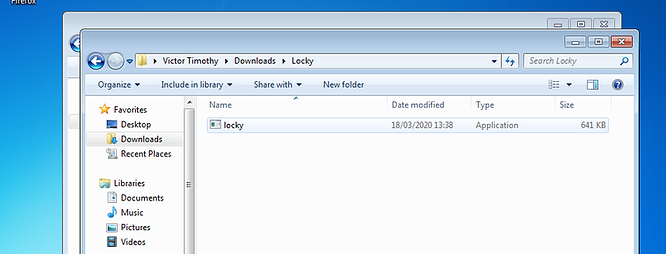
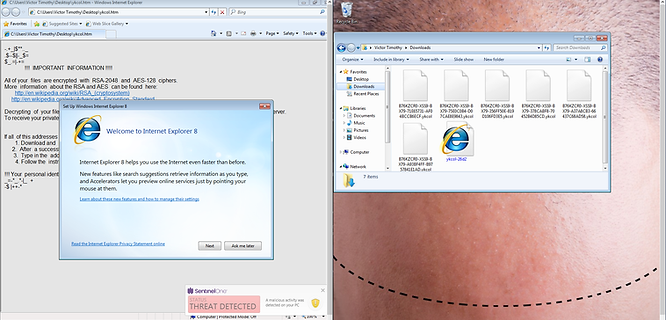
The malware that I used in this lab was a strain of ransomware named Locky. Locky can be distributed in various ways but is most commonly distributed via emails containing attachments enticing users to open them, or via drive-by-download. To lower the chance of detection and to give you a device in which to pay the ransom from, some ransomware like Locky will only encrypt specific file extensions. Locky scans the computer’s local and removable drives, as well as mapped and unmapped network shares in order to maximise its footprint. For further information on Locky click here.
The Setup
I used two windows virtual machines for this lab. I installed SentinelOne agent version 3.3.3.29 on both machines. I selected Windows 7 because protection for this platform is a hot topic right now.
To show two different points of entry, I detonated the ransomware on Machine B from both Machine B and Machine A.
For both tests, I share the drive of Machine A whilst detonating the ransomware on Machine B. This is so that Locky can see the drive as a network share and encrypts Machine A’s drive too. As this is moving from one device to another is should be seen as lateral movement.
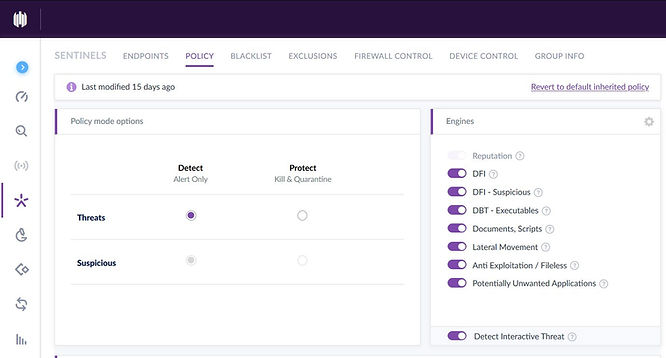
SentinelOne Policy
For this lab, I configured the policy to detect and alert on 'threats' and 'suspicious' actions using the SentinelOne Management console. If I had set the policy to protect, the malware wouldn’t run. This is because even at the lowest protection level, the agent kills the process and quarantines the executable. All Detection Engines were enabled during this test.
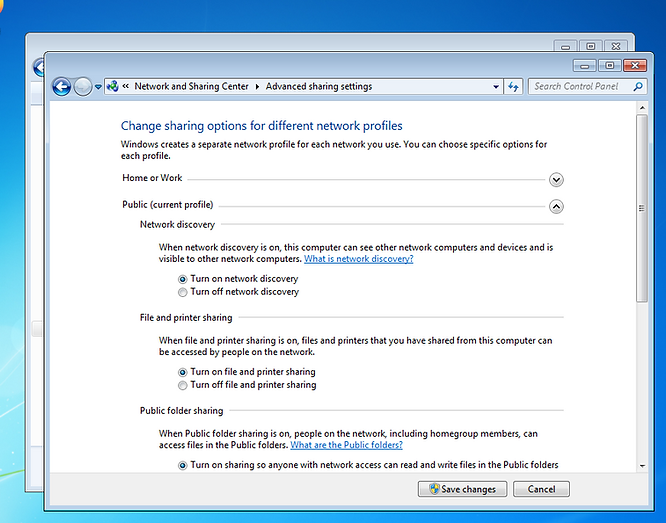
Configuring Network shares
Allowing network shares gives Locky access to Machine A (from Machine B) which, when it encrypts the drive, should be seen as lateral movement by SentinelOne.
Setting up the drive sharing
- Turn on network discovery.
- Turn on file and printer sharing.
-
Allowing Remote Access
As these machines are not joined to a domain, only local accounts exist by default and access is denied when trying to log in with a local account from a remote device. So to make access with PsExec easy, I added a registry entry called “LocalAccountTokenFilterPolicy”.

Preparing the Executable
Firstly, I downloaded the malware from a reputable online malware repository. Then, as the file was in a compressed archive, extracted the contents.
The SentinelOne agent scans every time something is written to disk, or a process is started. As the agent scans on write, the file is spotted as a threat both when you extract it and when you turn it into an executable (I renamed it, nothing fancy here).
At this point normally, with 'protect' rather than 'detect' enabled, the agent would stop the malicious process from running, then quarantine or remediate it depending on the protection level set up in your policy.
Executing the Malware
The First Test
Executing the malware from the same device (Machine B) is just a matter of double-clicking the executable.
Using PsExec
Firstly, I ran CMD (Command line) as administrator and navigated to the directory containing PsExec.
cd C:\Uders\Victor Timothy\Documents\ps\PSToolsSecondly, I connected to Machine B.
psexec \\192.168.56.101 cmdI messaged all users "hello" to check the command line access was working properly.
msg * hello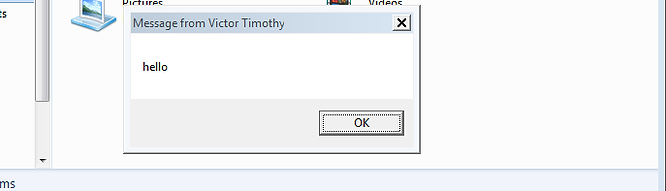
Then I navigated to the folder containing the malware.
cd C:\Users\Victor Timothy\Documents\This is a folder\ykcolFinally, I Started the executable.
start Ykcol.exe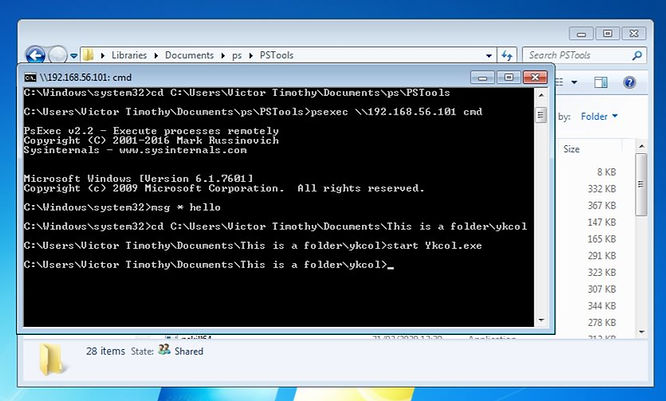
Once Detonated
For both tests, the end product of the malware looks the same. The files are encrypted and alerts from both tests display the same on the SentinelOne Management console.
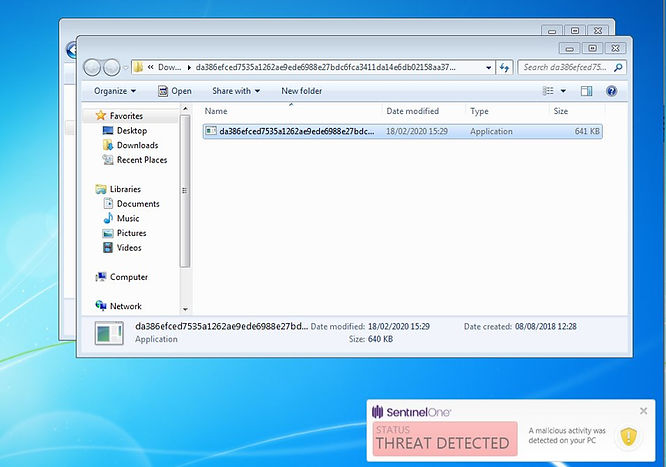
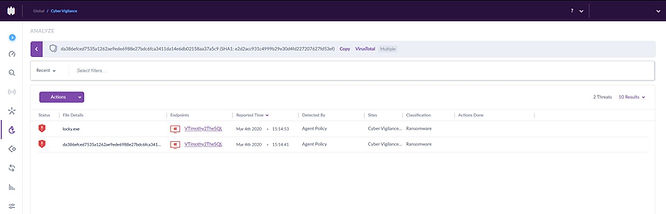
The SentinelOne agent alerts as soon as the executable is run because SentinelOne scans every process that runs, even if it has been scanned before. In the default configuration, the agent displays an alert when a threat is detected; moments later, the alerts are seen on the SentinelOne Management Console. Again, at this point normally the agent would stop the process from running, quarantine or remediate it depending on how your policy is set up.

Here are the alerts coming through on the analysis tab of the SentinelOne Console.
Owing to the Read/Write access on the remote device via the network share, the ransomware encrypts files on both devices.
Lateral Movement
The following screenshot shows how Lateral Movement is displayed in the SentinelOne Management Console. It’s clear to see that Locky is accessing many files on Machine A.
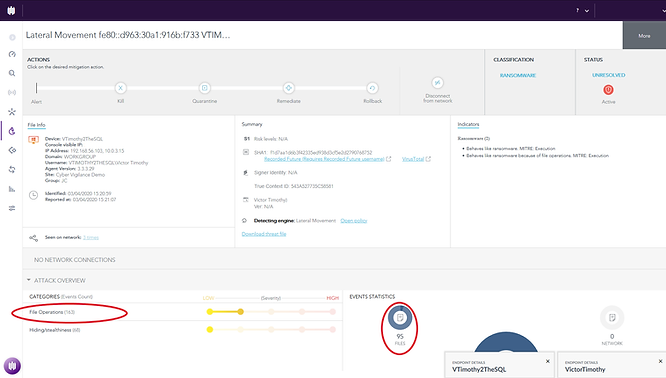
Looking closer at the event statistics we can see that 5 files have been created and 90 have been written.

Note: This behaviour was observed in both the locally and remotely executed tests.
Deep Visibility
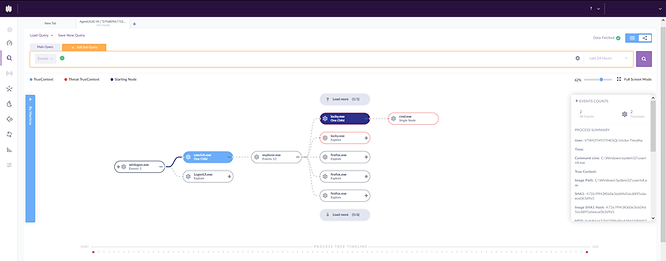
Executing Locally
After executing the threat on the device, you can clearly see, within Deep Visibility on the SentinelOne Management console, that a user-initiated action opened file explorer which then led to the execution of the Locky ransomware. In the pane on the right, you can see that the logged-in user was Victor Timothy.
Executing Remotely
As we can see in this screenshot, the threat was executed from the command line, and the command line was initiated by PsExec. Therefore the entry point was clearly PsExec and not the local user.
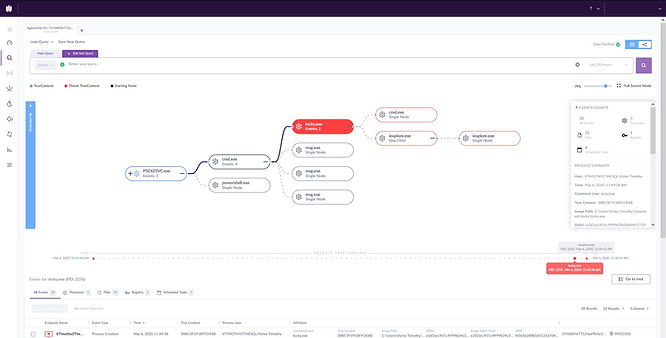
By entering the following query in the Deep Visibility console,
DstIP = “192.168.56.103” AND DstPort = “135”We can quickly identify the machine that connected to TCP port 135, which is the port most commonly used with PsExec (TCP135 - Dynamic RPC portmapper).

After finding the start of the PsExec process, we can clearly see that this was user-initiated and that the logged-in user was Victor Timothy.

Mitigating the Threat
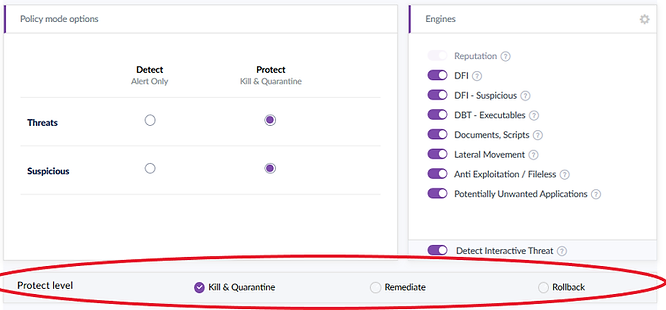
I mitigated the threat using SentinelOne’s rollback capability. If you would like a more in-depth guide on SentinelOne’s mitigation options, see our blog here. Rollback is the mitigation option to pick in the case of ransomware or data destruction. There is a checkbox to apply this mitigation option to all areas of your network in which this threat was identified. This would be beneficial if you have a worm infect your network, as it saves you having to pick this option for each instance individually. An example of this would be LoveBug from 2000.

Things like the desktop wallpaper are stored in cache, which is something that isn’t changed as part of the rollback. Although the threat is mitigated rebooting the machine to reset the cache brings the look and feel of the machine back to 'normal'. Again, for more on SentinelOne’s Rollback feature, see our blog on it here.
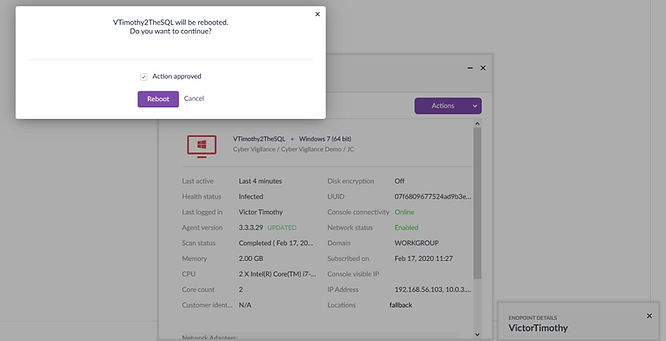
To Conclude
As Lateral Movement is shown leaving the device, along with the actions that were taken, we can investigate/remediate wherever the malicious event has affected, even if it doesn’t have SentinelOne installed.
Before this lab I had assumed that the True Context ID would be the same for everything in an attack chain. During the tests, it became clear the True Context ID is the same for events that are spawned from the same action/event, which could be a click, command or something else.
With deep visibility, searching for the start of the breach was phenomenally easy, this is due to most of the events/actions in the attack chain being linked automatically. The small amount of searching in the Deep Visibility console that was required was quick and straight forward. This feature is very user friendly and a force multiplier for any response team.
Get safer now
See how Managed Threat Detection can make a difference for you. No obligation free trial.
Subscribe to our weekly newsletter!
©2025 Cyber Vigilance
Powered by Disruptive
Naggs Stable, Old Portsmouth Road, Guildford, Surrey, England, GU3 1LP